Showing posts with label holidays. Show all posts

Friday, October 9, 2015

gooey butter cake


There is a time for kale, and a time for quinoa.  A time for lentils with herbed goat cheese, and a time for avocado on toasted sprouted wheat bread.  A time to fill your body with fruits and vegetables, and fuel it with the nutritional goodness that only whole foods can provide.

Folks, this is not that time.


The timing of this post is apropos, since I am in the process of wrapping up several months of heavy travel, and heavy eating.  As I time this, I'm on a plane eating kale chips (and making a total mess of it, come to that- I'm pretty sure my seat mate thinks he's sat next to an overgrown 2 year old whose food ends up everywhere but IN HER MOUTH).  Breakfast was a protein bar, lunch was a veggie chili.  All this healthy-shmealthy food, but my mind is still reminiscing about the fresh pasta, gnocchi, rustic bread with homemade butter, and panna cotta from the night before.  Ah, memories.  **SNIFF**


I'm finally get a decent stretch of time at home, and I plan to embark on some healthy, clean eating to undo the sins from the last couple months.  But NOT before I post a recipe that flies in the face of clean eating: ooey gooey butter cake!


This recipe comes from a former beau who hailed from the south.  The recipe is the purest example of the single girl's golden rule: never break up with a guy before you get his recipes.  Roger that.

The cakes origins lie in St. Louis, Missouri.  There are fancier recipes for it that you could try, but the one below is so easy and so incredibly delicious, why go to the trouble?  You're busy enough!  This recipe is cut from the same cloth as my favorite Cheesy Corn Casserole.  Staple pantry ingredients + box mix = a creation that will make the entire after church crowd swoon.

The cake is made in two layers.  And the result is a buttery, decadent treat that I can almost guarantee you will make over and over again.  I've never had a dessert quite like it, and I can't wait for you to discover it, too!


Gooey Butter Cake

For the first layer:
2 eggs
1 box yellow cake mix
1 teaspoon vanilla extract
1 stick of melted butter

For the second layer:
3 3/4 cups (or 1 small box) powdered sugar (plus a little extra for sprinkling)
2 eggs
1 teaspoon vanilla extract
1 8 oz. package of cream cheese at room temperature

(1) Preheat the oven to 350 degrees.  

(2) Mix 2 eggs, cake mix, vanilla, and the stick of melted butter.  The mixture will be thick.  Spread in an ungreased 9x13 inch pan.

(3) Next, mix the powdered sugar, 2 eggs, vanilla, and cream cheese.  Spread on top of the first mixture.

(4) Bake for 35-40 minutes, or until golden brown on top.  Don't overbake!

(5) When cool to the touch, sprinkle with powdered sugar.

Enjoy!
xo h

Thursday, February 19, 2015

dispatch from juneau: smoked alaska black cod dip

Ah, February.  That time of year where Alaska starts gaining daylight, the days get warmer and brighter, love is in the air, and the house is full of the comforting smells wafting from my little, tiny kitchen.  Simmering stews, roast chicken, corn casserole, homemade marinara…

Memories…so tender and sweet.  

Flash forward to present day reality check.  Relocate from Anchorage to Juneau.  Work looooong hours (holidays? weekends? what do these words mean?)  Attend 5,932,487 receptions.

Dinner these days either consists of (1) reception food, (2) hosted dinner food, or (3) half of a Newman’s Own pepperoni pizza, salad from a bag, and my beloved Trader Joe’s cookie butter. Oh, the difference a year makes.  A legislative session is not for the faint of heart, or the active cook.  Although twice I have managed to scramble eggs for myself!

I know, I know.  Chena Girl FAIL.


Since there are only so many bacon-wrapped scallops and crudite a woman can consume, I’m endeavoring to “up my game” in the kitchen down here in Juneau (which happens to be yet another tiny little kitchen so I feel right at home!)  Not only do I enjoy cooking, it’s cheaper than eating out, healthier, and a relaxing activity after a stressful day.  Chopping vegetables and searing meat are zen experiences for me.

One thing Juneau does well is seafood.  In my opinion, Alaska’s ocean bounty is second to none.  As I was browsing the offerings at a fantastic local shop, Jerry’s Meats and Seafoods, I came across a package of smoked Alaska black cod.  While wild Alaska salmon hogs most of the spotlight (and justifiably so), black cod is the unsung hero of Alaskan seafood.  Rich, meaty, and incredibly tasty, it might actually be my favorite Alaskan fish.  

One of my new pals here in Juneau made a delicious smoked black cod dip with cream cheese, chives, and brie.  Crazy, right?  Well, it was crazy delicious.  Except when I was home this weekend, I didn’t have any brie and I was hell-bent on using my smoked cod.  So I did what I do best:  I improvised!


There's nothing very fancy about this dip.  It's tasty and a bit unexpected (given that smoked salmon dip is the appetizer of choice at most Alaska parties).  The horseradish and hot sauce give it a little kick, while the lemon brightens the flavor of the fish.  And I love using fresh herbs whenever I can, especially when they are so plentiful in the grocery store no matter the season.  I happened to have all of these ingredients on hand, and you might as well.  If you don't, be courageous and feel free to improvise!  A tablespoon or two of grated onion would make a great addition if you don't have chives, and chopped fresh parsley would work well, too.


Smoked Alaska Black Cod Dip

1 lb. smoked Alaska black cod (also known as sablefish), skin & pin bones removed, and flaked
1/2 cup whipped cream cheese
1/2 cup mayonnaise
1 t. creamy horseradish
2 T. lemon juice
2-4 drops hot sauce
2 T. chopped fresh chives
kosher salt and freshly ground black pepper, to taste

Mix all ingredients except for the salt.  Depending on the saltiness of your smoked cod, you may not need much additional salt.  Chop extra chives to serve on top as a pretty garnish.  How easy is that?  While it's delicious served right away, it's even better to make it a day ahead of time to let the flavors meld together.  Serve on any plain cracker or saltines.  No fuss and delicious!


Enjoy!

xo h

Monday, November 24, 2014

roasted brussels sprouts with capers, walnuts, and anchovies


The Best.  It's a bold statement, right?  To say something is the BEST you've ever tasted.  People throw the phrase around too loosely and apply it to things that simply don't deserve such high praise.  "This is the best corn dog I have EVER tasted!" "Have you tried this burger! Best burger ever!" "OMG, this cheese may be the BEST CHEESE EVER."  And we all know that the chances of that corn dog, burger, or piece of cheese being the BEST EVER are pretty slim.
 

I feel like the word "best" is losing the grip on it's definition.  So when I say something is the best I've ever tasted, I really want to mean it.  So, here goes:
 
I'm pretty sure these are the best Brussels sprouts I've ever tasted.


My friend Karen introduced me to this recipe last year and it's the only way I ever want to eat Brussels sprouts anymore.  When I serve these to friends, they often approach the dish with reservation.  Brussels sprouts?  Anchovies?  Honey?  Say wha?!  But my FAVORITE part is watching them taste their first bite.  That's all it takes.  The flavor of the golden roasted Brussels sprouts paired with the salty, briny, slightly sweet vinaigrette and crunchy walnuts is genius.  It just...works.

Roasted Brussels sprouts has been at our family's holiday table for many years.  But this year, I'm going to introduce this new twist on the old family favorite.  And I can't wait to watch them take their first bite!
 
Happy Holidays everyone!


Roasted Brussels Sprouts with Capers, Anchovies, and Walnuts
 
(Recipe courtesy of Karen Wilken)
 
3 pounds Brussels sprouts, halved
3/4 cup extra-virgin olive oil
salt and freshly ground pepper
1 cup walnuts
1/4 cup red wine vinegar
1 tablespoon Dijon mustard (or a grainy mustard)
2 tablespoons honey
3 tablespoons capers, rinsed and chopped
2 garlic cloves, minced
2 shallots, mined
2 tablespoons anchovy paste (or one 2-ounce tin of anchovies, drained and minced)
 
 
(1) Preheat the oven to 425 degrees. Spread the walnuts on a shallow baking sheet or pie plate and toast in the oven for about 8 minutes, until golden and fragrant.  Once cool, coarsely chop and set aside.
 
(2) In a large bowl, toss the Brussels sprouts with 1/4 cup of the olive oil and season with salt and pepper.  Spread the Brussels sprouts on to large, shallow rimmed baking sheets and roast for 35-40 minutes, tossing with a spatula halfway through cooking.  They should be golden and charred in some spots. 
 
(3) In the same large bowl, whisk the vinegar, mustard, and honey.  Slowly whisk in the remaining 1/2 cup of olive oil until the mixture is emulsified.  Add the capers, garlic, shallots, and anchovy paste.  Taste, then season with salt and pepper as necessary.  Add the sprouts and the walnuts, toss well and serve.

Enjoy!
xo h


Wednesday, October 29, 2014

chocolate-dipped orangettes


Happy Halloween, little goblins!  This post represents a departure for Chena Girl.  I've been called many things over the course of my life.  Heidi, for starters. But also...lawyer, cook, forager, social butterfly, Suzy Homemaker (by my sister Holly), loud (by my brother Erik), fisherwoman, hostess, but...candymaker?  Nuh-uh.  Never. 
 
Hey! This post is making history!

May I present to you...the world's ugliest kitchen counter!  I'm thinking of creating a Kickstarter campaign for a new kitchen.  Thoughts?
 
I think it's healthy to push your personal boundaries in the kitchen.  In fact, I think pushing your boundaries is healthy in most aspects of life.  Even if you end up pushing it just a LITTLE too far.  Like the time I was trying hard not to dress too "matchy matchy" last year and showed up to work wearing nearly every color of the rainbow. Blue tights, a red printed dress, and a bright yellow scarf.  I was a walking fashion catastrophe/perfectly dressed for directing construction traffic.  I looked so ridiculous that my secretary called me "the elf" the rest of the day.  True story. 
 
[In fact, I used to have the photographic evidence to prove it.  But as I flipped back through the pictures on my phone, I realize that my Back to the Future Self must have deleted it in a clear attempt to save Future Self from the public shaming that she surely would have submitted herself to.]
 
But I digress.

 
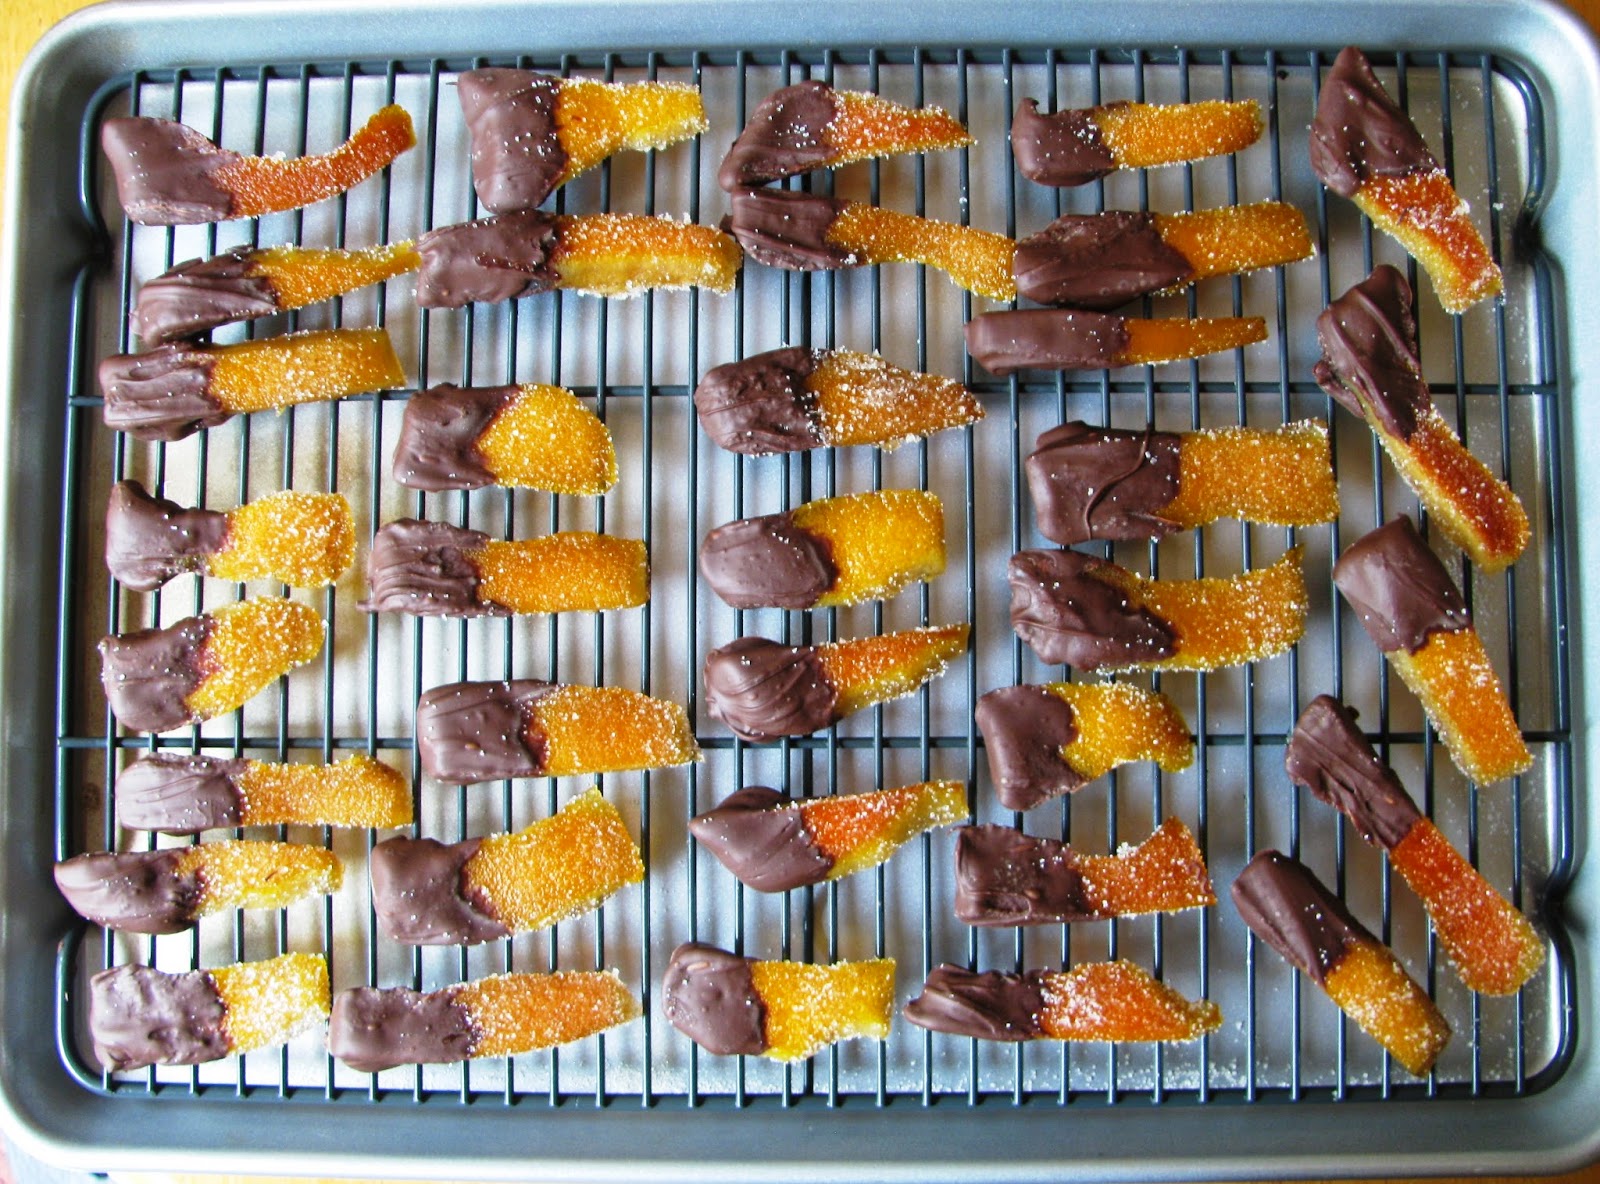
I was home one Saturday folding laundry while watching TV when I noticed a woman making these seemingly easy candied orange peels dipped in chocolate.  I had 3 naval oranges on my counter, and all of the ingredients in my pantry.  So I finished the laundry, and then got to work adding a new title to my resume: Candymaker.
 
And they turned out GREAT!

 
In fact, they turned out a little too good.  My plan was to make a huge batch of them, save a handful (5-10 tops) for myself, and give the rest away as gifts to family and friends.
 
 
HAHAHAHAHAHA!!!
 
 
I'm sure my friends and family would have loved them.  Maybe next time.


Chocolate-Dipped Orangettes
(Adapted from Julia Baker)

4 oranges
2 1/2 cups sugar
1 cup corn syrup
3 cups water
1/2 pound semi-sweet chocolate
granulated sugar, for sprinkling

(1) Slice the rind off the oranges and slice into desired thickness. Place orange slices in a wide skillet or pan and cover with cold water. Bring to a boil, then drain.  Repeat this process a total of three times. 

(2) Heat the sugar, syrup, and water in a medium-sized pot.  Once the sugar is dissolved and the syrup is warm, submerge the blanched orange peel in the syrup and cover with a lid that is one size smaller than the pot (this way, every peel is completely submerged).  Simmer for 60-90 minutes.  Place a wire cooling rack over a piece of parchment paper or aluminum foil.  Remove the peels from the syrup (which you can save for Italian sodas!) and place them on the wire rack- the parchment/foil will catch drips and make for easy cleanup.

(3) Melt 2/3 of the chocolate chips in the microwave, stopping to stir the chips every 30 seconds.  (Be careful NOT to microwave them too long!)  Once the chocolate chips are melted, stir in the remaining 1/3 of the chips (called "seeding" the chocolate, which results in a smoother melted chocolate), and stir until melted and smooth.

(4)  Dip orange peel into chocolate and cool on parchment paper.  Sprinkle orange peel "tails" with granulated sugar, if desired.

Enjoy!
xo h